Image Map
Showing posts with label Decor. Show all posts

March 27, 2019

Puppet Placement


Happy Spring! Our school year has been crazy! We had several weeks of illnesses - so bad that they considered closing our building and cleaning it. Then, we had several snow storms in a row. We didn't miss that many full days as much as we had late starts. When the snow melted, massive flooding occurred. Our area was able to absorb most of the water but other parts of Iowa and Nebraska were not so lucky. Many places (including our schools) have begun donating items, money and volunteering to help these people put their life back together. #NebraskaStrong


But, spring has given me some more time to share ideas and thoughts as we finish one year (and start thinking about another). Today I'm going to share with you my organization for various puppets. 

I love puppets so much! You can read about some of the puppets in my room here: Puppets - A Newfound Love.


For my soft, plush puppets, I use a shoe rack. I found this pretty durable one on Amazon. It's not exactly the straightest one, but my custodian was able to tighten it up for me. I've organized mine a little differently to evenly distribute the weight. 


I place the puppets on the different hooks using the gap where you would place your hand to use each one. It's even able to prop up my smallest finger puppets, like the seal and bird. 


My favorite collection of puppets, though, are the ones on a stick. Education Insights makes these wonderful plastic puppets on a stick, giving you two different ways to use them. I especially love these because you can easily clean them! This is so important with all the germs going around. I would even clean them when we didn't use just to be safe. You can push down the thumb lever or pull the ball at the base of the puppet. 


They've released different sets in the past few years, but I currently have:
  • Monsters (Fez, Kai & Lex)
  • Rainbow Prancers (Dazzle, Twinkle & Shine)
  • Prehistoric (Buster, Crusher & Stomper)
  • Sea Squad (Bob, Chomper & Dipper)
  • Zoo Crew (Elephant, Giraffe, Lion & Monkey)

I have 35 in all - some I have duplicates of while others don't. I like to have extras so the kids do have some selection even if they're the last ones called to come up. Because of their interesting shape, I struggled to find something that would hold all of them, not take up much room and also be easily accessible for my students. Then, I struck gold! 
Walmart was clearing out the last of their "back-to-school" items and had these wonderful storage crates for $2! I bought one and brought it to my classroom - they were perfect! Thankfully, I was able to snatch up a few more for my puppets and general storage. The bright colors were also a big bonus. The puppet is able to slip through a hole at the top and dangle inside the crate. Since some of the heads are large or irregular, I space them out a bit and try to sort them. I actually have a student that comes to my room and sorts them regularly as a calming activity. She never sorts them the same way, but it a place for her to come and find comfort in a unique sensory situation. 


I hope this gives you some new ideas on what to do with those puppets. Do you have another way to store them? Share below!


October 26, 2016

Shoe Storage for Boomwhackers: A Tutorial


How many of you have boomwhackers in your room? *raises hand*

In the past, I have stored my boomwhackers in plastic coffee containers. My room was large but had a nice instrument cart for them to sit on top of. In my new classroom this year, I have very little storage. I barely have enough room for movement materials and classroom instruments, let alone eight separate containers of various sized colored tubes.

For the first month of school, my boomwhackers laid on the floor in the plastic wrap they came in. I was stumped and was about ready to create shelves or something. Then, I stumbled upon a genius idea from the Facebook group for music teachers: plastic shoe organizers!

I knew immediately that this was the answer. Thank you, Laurie E.!

So, how do you go about making this? Have no fear - I am here to share! My materials maxed out at about $20 and I completed the project in 15 minutes. 


To begin, you will need the following items:
  • plastic shoe organizers (I used two, which ended up holding 8 of each color)
  • scissors
  • hanging materials (I used command hooks, but over the door hooks were included)


Step 1:
Spread out your shoe organizer on your work area. Think of the top as row 1 all the way down to row 6 at the bottom.


Step 2:
For this step, you will be focusing on rows 3 & 5 of slots. Cut the fold at the bottom of one of the slots and then cut across. You are removing the slot from the organizer so it opens up. You should be able to stick your hand through it. This is where the taller boomwhackers will slide through. 


Step 3:
Repeat the process for all of the slots in rows 3 & 5. Pull the plastic out so it creates a shoot. Again, the plastic is attached at the sides, but the top and bottom are open. This will encase the boomwhacker. 


Step 4:
Prepare to hang your organizer. I attached basic Command hooks to the wall, using holes one and four. Included with mine was an "over-the-door" option. If you don't have a lot of space but have doors, this would be another space saver idea!


Step 5:
Fill and organizer! On my wall, I was able to fit two side by side. The longer tubes (C-F) should slide down through the hole you cut into the bottom slots. The shorter tubes just fit normally into the shoe slots. This is my set-up, but you are welcome to get creative and adjust it to your needs.


EASY! It actually took me longer to put together this blog post giving you directions than to make both of them, hang and stuff. We've already used them a few times and clean-up is quick. I love how it makes use of a blank wall with bright colors. 

Have you had to be creative with storage in your classroom? I'd love to hear new ideas - please share below!


August 31, 2016

Music Room Reveal 2016-2017


I'm really excited to finally debut my new classroom to you all! I've linked up with Mrs. King's Music Class to show you my room, as well as take a peak at other teachers' classrooms.


This year, I am in a new district and building. In the past, the music room was outside in a portable due to class sizes. This is the first year it is back in the building - hooray! I'm in a previous first grade classroom and it has a ton of character. I love it! My theme is chalkboard brights to highlight to fun wall colors and real chalkboard in my room. Let's take a tour!


This is the west side of my classroom. The door to the right (not pictured) leads to the gym and 2nd/3rd grade wing. I love these posters. They are colorful and really interesting for students to look and learn. I also have my huge children's literature collection divided by fabric, color and theme (composers, stylistic, movement, etc.). The bottom plastic bins hold games and activities for multiple grade levels. You can also see my filing cabinets with their not-so-awesome paint job. This holds Music K-8, Express, programs, and other curriculum stuff.


Going counterclockwise is my desk. I'd like to say that I can use the closet you see but I can't - it holds the furnace for this part of the building. Still, it provides a place to hang my substitute things. My bulletin board has schedules, pictures and other stuff about me.


Here is my main whiteboard. My standards posters up above, as well as the handsign and voice posters are all from TeachersPayTeachers sellers. Let me know if you'd like more detailed information on them. My boards are divided by magnetic border and regular bulletin border in chalkboard brights from Teacher Created Resources (yay Amazon Prime!). 


In front of the whiteboard are my SitSpots. These are brand new this year! The company came out with music notes in purple, green, blue and red. I chose three of the colors and stuck them down. Love! They work great for student seats, instrument groups and games.


This is where you start seeing the character of this room. You can't see it but there is a door to the left in the middle of the room. This used to be two classrooms and then just one, but they left the door. I curtained the door to create the "instrument corner." My mallets are lined up, misc percussion in the closet and the electric piano in front. The cupboard in the back will hold the drums I will be receiving in a few weeks from a grant. The fan is there because there is no ventilation in my room (only drawback I can find). It keeps air moving while we're moving!


Here's a better view of the door and my curtain. It is really fun - I love it! People were joking during my interview about dealing with the door, but it is such a great piece to separate the instrument corner. I also have the Spotlight on Music curriculum on the bookshelf. We don't use it much but it's nice to have out.


Here is the whiteboard on the other side of the room. It has the concert schedule up on the left side. On the top are alphabet instrument posters. I created the chalkboard solfege handsigns that you see on the right to go with my classroom theme. In the middle are the iPads we received from a grant - can't wait to use more technology in music!


This is the display case outside my room. Every teacher has one and it's a great place to show your personality. I have instruments, music books and Beethoven hanging out right now. I'll change it each quarter to fit what we're talking about in class.


On the big glass outside my room are vinyl words that say "Sing Say Dance Play." I love this motto for my classroom! We do so many fun things and this is such a unique way to reach out to those walking past the classroom. I purchased them as a special request from the Etsy store RhythmicallyYours. She is a fellow music education teacher/TPT seller and has such fun stuff in her store. I just peeled them off, stuck them up and got the wrinkles out with a credit card. I also stuck up some music window clings around them to fill the space.


If you want to see my classroom in action or see things a little more closely, check out this video I took after "Back to School" night. 


Thanks for checking out my room reveal! Be sure to click on the link to Mrs. King's Music Class and see all the other awesome rooms. Have any suggestions or comments for me? Leave them below - I'd love to hear from you or see what's on your walls!


August 20, 2015

What's on YOUR Wall?


It's "Back to School" night here at my building! It's so exciting, but nerve wracking at the same time. I've finally put up everything and fixed things for this year. Check out my photos as I link up with Mrs. King's Music Room!


First up is my Concert Calendar. It's nothing fancy, but it helps so much!  The kids love seeing when siblings programs or counting down the days. The best part is putting a HUGE check mark over their date when it's finished!


On the board, I've posted our revised rules titled "The Cyclone Way." This is something new for the coming school year, but it is a district-wide behavior plan. 


My bulletin board is a silly one! Our theme (if you haven't guessed by the previous picture) is all about sports, specially TEAM. It stands for "Together Everyone Achieves More." It won't be up for long, but I thought it was a little different than a traditional sports bulletin board. You can check out more about this theme at the end of the post!


Something new in my classroom (commence with loud "fan girl" screaming) is the iPad minis!!!! I was blessed to receive a grant from the National Education Association for 13 iPad minis, cases, headphones, a splitter and two apps (GarageBad & MadPad). Over the course of the year, I will be documenting and reflecting on the use of these in my classroom with the students. I am so excited. Above them are some great rules for their use. I got these for FREE from Music and Technology on TeachersPayTeachers.com. Click on my picture to take you there to get some of your very own.


The ramp walls have different styles of music. You can get these posters from different music stores like West Music, Music in Motion, etc. They give a little information about the genres of music, as well as a famous musician. The kids enjoy looking at them when lining up.


Last is my primary door. I leave the intermediate door the same because I love the quote. You can check it out HERE. Anyway, this door changes with the team. My favorite part is the chorus poster with "teamwork." I've been eyeing it for awhile now.


If you like the look of this theme in my classroom or want more information about different options, check out my "Let's Have a Ball in Music" Decor Set. It includes welcome banners, bulletin board ideas, labels, posters and other fun goodies. It's also on sale and discounted as a bundle. 


June 20, 2015

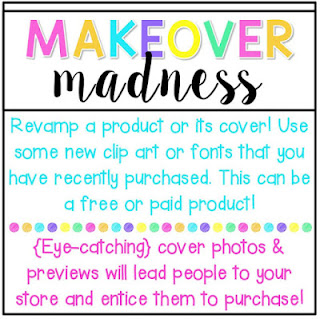
TpT Seller Challenge - Week 1 Makeover Madness

Welcome to Week 1 of the TPT Seller Challenge! This is a month long of challenges to encourage growth as a seller on TPT. The first one is all about makeovers. 


I finally finished my first set of music classroom decor. Wow - it was a lot more time consuming than I thought! Our building is focusing on goods sportsmanship, community and being awesome learners as a team. So, I decided to create a sports themed decor set called "Let's Have a Ball in Music!" I created it first and then posted it, realizing that the cover pages were BORING.

This was a great opportunity to complete my first week challenge! I eventually revamped all of my covers, 6 products in total. Here is a sample of the before and afters:


Each file comes separately or you can purchase the whole bundle at a discount! I've attached the bundle below, with a link to the different files. See you next week for challenge #2!


August 13, 2014

My Music Room Set-Up

I'm linking up with Mrs. Miracle's Room and other fellow music education bloggers to show my elementary music classroom! I have been working for the past few years to turn the room into what I feel is beneficial to me as an educator and to my student's learning. Also, I completed a lot of DIY Pinterest projects to spice up my room. Finally, I GOT CARPET! Check back a few posts for the "bare bones" picture - it's so exciting! 


Anyways, I hope you enjoy the tour of my room. I'll try to include links, products or materials of where I found all my ideas. Let's get started!


Here are the two entrances to my classroom. Both doors are kind of boring, so I always try to spice them up a bit so no one misses them!


Also, here's the handicap ramp. We did have students that used it in the past, but right now it is kind of empty. I tried to decorate it a bit this year with wonderful musician quotes by David Row. It's a nice way to tie in some of the student's favorite musicians with advocacy!


Here's the sound cabinet. It's a great cabinet, but it's bolted to the floor. It is also awkwardly placed when you're trying to teach students from the projector. Still, it keeps everything in one spot, which is awesome! I also put together a guide and attached it to the door for staff, subs, etc. It has pictures and information for anyone wishing to use the technology in the room. Here's hoping it comes in handy! I also put up a concert calendar on one of my bulletin boards. It makes it easier to point then to say concert dates a hundred times a year - ha!


New carpet - whoot whoot! I have chairs, but I wanted to try Sit Spots this year. They are pieces of velcro (lots of shapes to choose from) and adhere to the carpet. So far, they work awesome!


I don't really use my whiteboard for much writing. I use it more to display things, check behavior and write notes to the different grade levels. Since it's the beginning of the year, it's completely full of new information! The right white board is small and usually covered by the projector screen. Because of this, I decided to display my Little Thinkers puppets and composer dolls. I also put up my Sing-a-ma-jigs. I really want to incorporate more dolls, models and puppets into music. I'm a visual learner and these are a great help to me, for sure!


Here's some wall decor and another bulletin board. The windows have group posters (solo, duet, etc.). I really like displaying the solfege houses and handsigns in as many places as possible for the students. I also put up my bulletin board for the first few weeks with a beach theme. The intermediate theme was "Dive Into Learning." You'll also see my stacked chairs. I really dislike the chairs, especially for the younger students, so they stay stacked most weeks. There are 2 spots labeled "Rest Area" for those students that need to take a break and think about better choices.


Here are some storage spots. I love my moving cart for the classroom instruments! I also love my huge metal racks in the back of the room. They stink when it decides to flood, but otherwise, they store lots of things easily. My mom fitted a curtain to go over it so the students would stop investigating while we were learning. You'll also see my noodle ponies! Can't wait to use these in a few weeks!


And we finish the tour back at the primary door. I have books, but we rarely use them. The dots on the floor are rubber dancing markers. I taped them down to show the students where to stand in line. There is also a wooden black treble clef attached to the stair rail. I'm not sure which blog I found it on, but another wonderful teacher used this as a teachable moment! The treble clef is at the beginning of music, so it shows the beginning of the line. Great connections!


That's about it. Oh, wait - I forgot the most important space.....MY AREA! Haha - I'm just kidding. It is probably one of the least important areas. Anyways, here's my desk, bookshelves, etc. I love fabric bins so those are everywhere in my room. There's also another bolted cabinet for storage. 


Now, this really completes the tour - I promise! I do, though, have a lot of amazing things in my room from other teachers. If you're interested in anything in these pictures, I've compiled a list below for you to check out on TeachersPayTeachers. If there's something I missed, please let me know. I always want to give credit where credit is due. I'd be nowhere without the help from some wonderful music educators.